This product includes STL & CAD files to make any changes yourself to the design.
This product is fully designed to be 3D printed. It's a massive build (actual size) and my most extensive 3D print yet, requiring a minimum print bed size of 300 x 300mm. It's sturdy and probably over-engineered, as there can be a lot of force exerted through a person's legs onto the unit.
The unit has a total of 3 axes:
1 x rudder axis
2 x brake axis
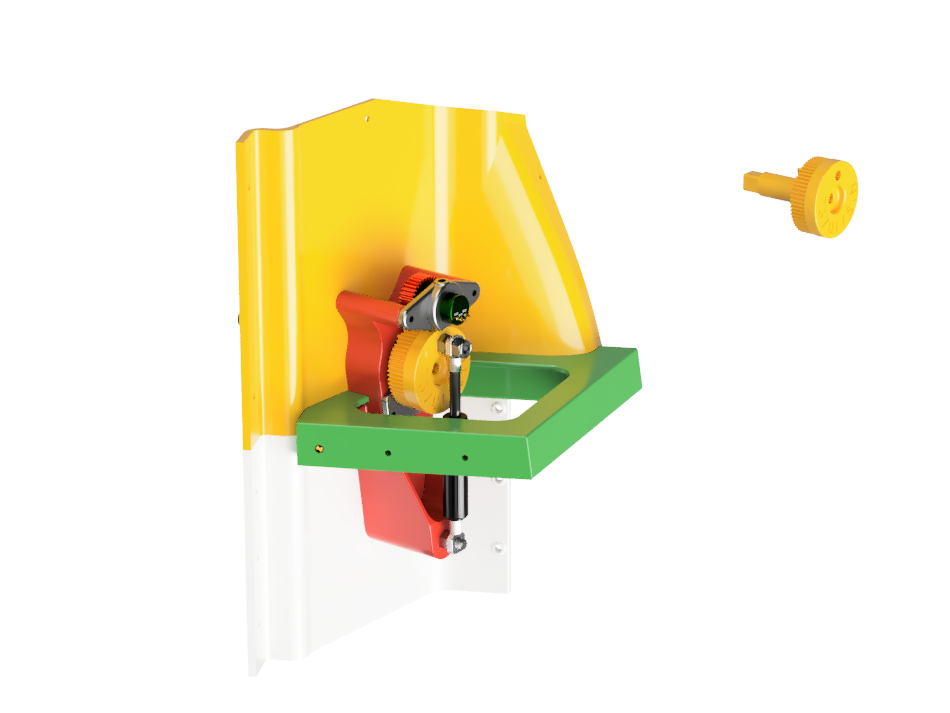
The interfacing can be easily achieved using an Arduino micro pro. I have included a lot of bearings to make the unit feel smooth and to help spread the load exerted between the parts. The pedals are not only supported by plastic but metal threaded rods to help share the loads.
The pedal position is fully adjustable forward and backwards by around 100mm. This is achieved by the adjustment handle at the front of the unit just like the actual aircraft. The pedal unit then rides a buggy assembly on six, 608 bearings held in position by the M12 threaded rod.
Please note: This is a massive 3D print taking around 2 weeks to complete and 4 rolls of PLA. For more advanced users, building the footplates and centre tower from wood may be quicker.
I used a 0.4mm nozzle for this build, would I would recommend switching to a 0.8mm nozzle for the external parts to speed the process from days to hours!
FAQ:
Q: The build guide for the STL rudder pedals mentions a 300×300mm print bed. I plan to make the shell and larger parts out of wood. Can I use an Ender Pro with a 230×230mm bed to print the pedals and mechanical components?
A: Unfortunately, no. Several key parts of the rudder pedal assembly exceed the 230×230mm print area and require a larger printer. Specifically:
- The base truck that holds everything together
- The pedals
- The vertical connecting pieces that join the pedals to the base truck and house large bearings
While smaller parts are printable on compact machines, the critical structural elements need a larger bed.
Tip: If you're committed to using a smaller printer, you might consider splitting the larger parts into printable sections and assembling them post-print. This approach requires careful planning but can be a viable workaround.